Wind Energy: Harnessing Its Power


This lesson begins by watching a short video on the history of wind power.


Younger kids might enjoy this one, too.


This wasn't planned, but since the Lego's are always out, my kids made different windmill models to keep their hands busy while watching the videos.

Lastly, we made this model wind turbine. We printed it out, pasted the sheet onto card stock, and then cut out each piece before assembling it.


This lesson concludes our unit on Wind Energy. Now it's time to take a Challenge!

Make something that uses wind power to do a real task. It can be as simple or as elaborate as you like. Think like Curious George and raid the recycle bin! Or you can purchase kits and materials to make your own working model turbines from KidWind. Please share your creations with us!

Wind Energy: Design For Protection

For this lesson you will need to pop plenty of popcorn, some to snack on and some to play with. Yes, we will be playing with our food. You will also need a small table fan and some building blocks.

While the popcorn is popping, take a look at how others are designing to protect their crops and livestock from damaging wind.


Next, get the popcorn and place some on a table. This is the crop you are trying to grow. Point the fan at the popcorn and turn it on. See what happens at different speeds. Now, using blocks, play with different arrangements to design ways to protect your "crop" from the wind.
Notice near the end how some of the kernels were drawn toward the fan. This is because the strong wind blowing over the garden wall created a difference in air pressure inside the garden, thus creating suction. If your garden site is prone to strong prevailing winds, be sure to design windbreaks that allow some air to pass through.

Wind Energy: Keeping Track

In our last lesson, we ended by making a simple anemometer to measure wind speed. To use the anemometer, take it outside while the wind is blowing and count how many times it spins. Use the chart with the anemometer assembly instructions to convert revolutions to approximate wind speeds. Continue to observe wind direction with your windsock.


To keep a record of daily wind speeds and directions, fill out a wind rose. You can find a printable version at the bottom of the right hand column of this page from Weather for Schools. Use the Excel spreadsheet provided above the printable format to record your data and watch a wind rose automatically appear. Record wind speeds in the "comments" box. Happy wind chasing!

By Tholly (Own work) [CC-BY-3.0 (http://creativecommons.org/licenses/by/3.0)], via Wikimedia Commons

Wind Energy: Regions and Seasons

Tree flagging occurs when strong prevailing winds cause  most of the branches to grow on one side.(By Nicholas A. Tonelli from Pennsylvania, USA (Flag Tree) [CC-BY-2.0 (http://creativecommons.org/licenses/by/2.0)], via Wikimedia Commons)

For this lesson, look up the prevailing winds for each season from the Climatology Office for your state or region. If you wish, study the major factors that cause these winds. For instance, our climate in South Carolina is greatly influenced by cyclones (closed swirls of air around low pressure centers following the Earth's rotation) in winter, circling the Appalachian Mountains and moving out the Atlantic. Sometimes air circulates from the Northeast down around the west side the mountains, bringing weather from the Southwest as it comes back up through our state, but as the cyclone moves eastward toward the ocean and away from the mountains, the wind comes directly from the Northeast. In summer, the climate is affected by the Bermuda High, an anticyclone (a system centered around a high pressure area and spinning opposite the Earth's rotation) bringing air from the South and Southwest. (These systems can be illustrated on a map by making circular motions with a pointer or finger.)

Print out a blank compass rose for each child and mark first the eight compass points. Have a globe or world map handy to show that North always points to the North Pole, South to the South Pole, East where the sun rises, and West where it sets. (A source of light from one direction that allows one half of the globe to be in shadow while the planet slowly spins is a great way to illustrate this.)

Next, choose a color for each season and mark that season's prevailing winds on the compass rose.
Here the prevailing winds are illustrated by colored lines drawn around the spikes of the compass rose

For another fun weather activity to calculate wind speed, make this anemometer. We will be using it track wind speeds along with our windsocks to better understand how our site is affected by wind.

Wind Energy: Force and Direction

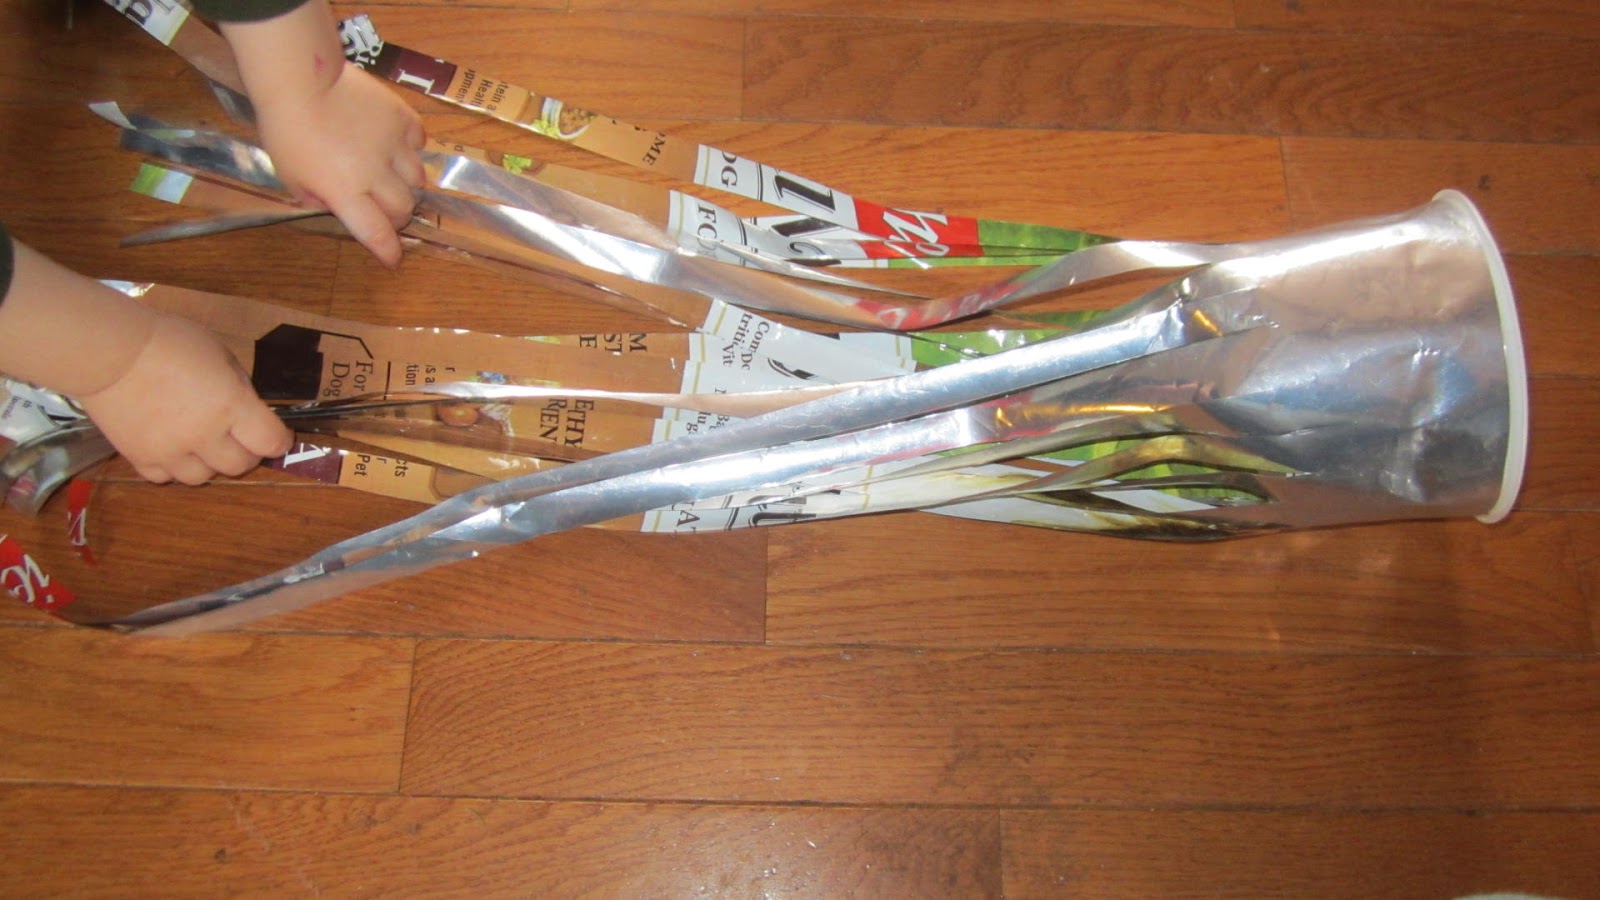
For this lesson, we used the chapter called "Wind In Your Socks" from NASA's Aeronautics Educator Guide. Instead of using paper to make our windsocks, though, we used a variety of plastic recycled items, and a hot glue gun instead of tape for a more permanent result.

Step 1:
Cut a ring from the top of a plastic food container and prepare a plastic or foil bag by cutting off the seams so that it will lay flat. Wipe any remaining food particles from the surface of the bag if you need  to. This one used to have dog food in it.

Step 2:
Using a hot glue gun, attach the bag to the plastic ring. Trim off any excess.

Step 3:
Cut the bag into strips up to the plastic collar.

Step 4:

Punch 2 or 3 holes at equal distances apart on the plastic collar. Tie some strong string to each hole, then tie them together in the middle onto a paper clip. Tie on a long piece to hang it with.

A leftover party bag and a yogurt cup make a great windsock!

Step 5:
Discuss the questions from the lesson above, and any others that come up. Then go to the site of your future playgarden and set up your windsock. We tied one to a tall stick and then drove a metal post into the ground and tied the stick to it. Next, use a compass to mark North, South, East and West by poking sticks into the ground and tying on brightly colored ribbon.

Step 6:
Observe the wind speed and direction. Remember the wind direction will be to the compass point opposite to the direction the windsock blows, since winds are named by where they come from, not where they are going. Use the speed chart from the lesson linked to above for comparison. Also, look up your local weather on the Internet. If the website has the feature, choose to get instant updates from the nearest weather station. Then compare the speeds and directions with your windsock activity. We found that the big, stready gusts were in agreement with the station, but the smaller puffs were not. Talk about how trees, building, mountains and other objects might alter the speed and direction of the wind. If desired, fill out the worksheet included in the lesson.
What other objects in Nature indicate wind speed and direction?
You may also want to set up windsocks at different heights and observe any differences in speed and direction.


If you like, you can make up some beautiful windsocks using recycled materials and adding colorful ribbons and streamers. These can be used as gifts for your sponsors and to help raise funds for your playgarden. Send us your pictures and we will put them in the gallery!


Getting Started

There are no right or wrong ways to approach the design process. Your situation will have its own limitations and opportunities (and we encourage you to view limitations as opportunities to design creatively). Below are the steps we took to begin work on our designs.
D Sharon Pruitt


Step 1. Look around at other edible playground and schoolyard designs. Check out the Gallery and Links, and do your own web searches. Browse different types of garden beds and landscape features, as well as ways people have integrated playgrounds into the natural environment. If you would like to start with something small, check out our project Pods page for ideas. And don't forget how other species can have a beneficial place. For instance a rabbit hutch can be placed above a worm bin, and the finished compost used as a rich fertilizer in the garden, which can then supply carrot tops and other unused parts of vegetables for the rabbits and worms.

Step 2. Make an Idea Cloud. Get a piece of paper or chalkboard and have everyone call out words relating to everything that they want a garden playground to be. They can be concrete nouns, like an apple tree, verbs, like splash or dig, and abstract words like fun and peaceful. The sky is the limit. This exercise, like the next one, is to allow practical inhibitions to be circumvented so that designers can get in touch with their true, empowered selves.

Step 3. Draw your dream garden. Each child gets pencils, crayons and paper to draw a picture of the most perfect garden they can imagine. Changes can be made later to the designs, but they will most likely be minor. If it is a group design, the most popular elements can be identified and voted on after each child is allowed to tell about and explain their drawings.

Step 4. Divide the design into small projects. List everything you need for each element, and research the cost of each item. You may want to choose to install first the elements that can have the greatest effect for the least cost, such as a vegetable or flower bed. This will insure that there will be something to work on right away, that interest will continue and some products even used to raise further funds. Check out our curriculum page for incorporating lessons into the site analysis, design and implementation phases. This will help to integrate and place the more permanent elements to best advantage.

Step 5. Set up a blog or facebook page for each child to document their progress, both for raising funds and  for implementing their designs. This way, their sponsors can keep track of the way their investments are being used and will be more likely to continue their support. It will also help raise further funds. Don't forget to link in with us here, too!